HOW TO INSTALL
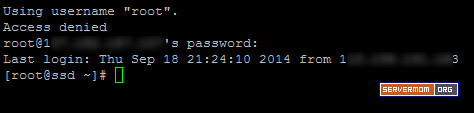
Step 1 – Login to your server as root:
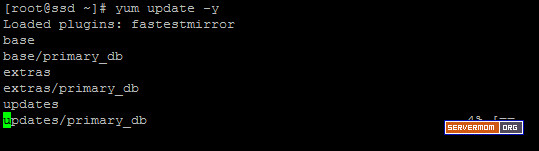
Step 2 – To make sure all things are updated, run ym update command:
wait for the process to complete
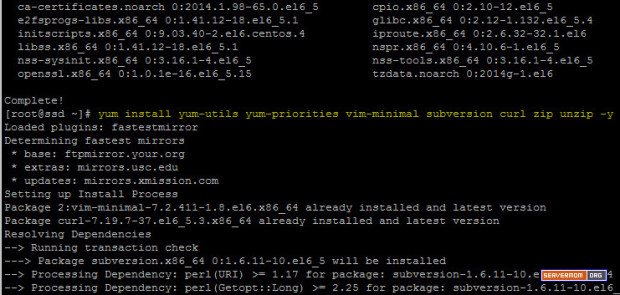
Step 3 – Issue this command to install some necessary packages:
Mã:
yum install yum-utils yum-priorities vim-minimal subversion curl zip unzip -y
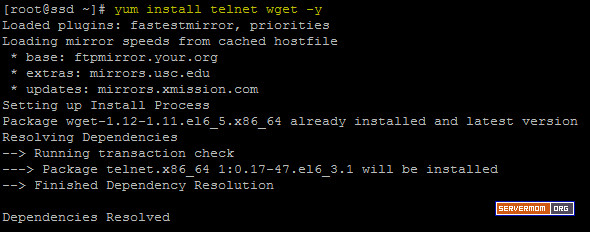
Also this one:
Mã:
yum install telnet wget -y
Step 4 – Make sure SELinux is disabled. You can check it with this command:
sample output:
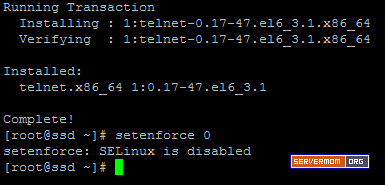
if not, you can disable it using this command:
Mã:
echo 'SELINUX=disabled' > /etc/selinux/config
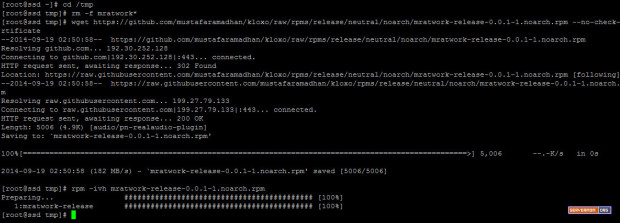
Step 5 – Now you can add repo URL of Kloxo-MR. Currently -during I write this post- there are two main version: v6.5.0 and v7.0.0. This guide will show you how to install Kloxo-MR v7.00. Start by changing directory to /tmp.
then remove old .rpm if any:
Then download the repo file using wget:
Mã:
wget https://github.com/mustafaramadhan/kloxo/raw/rpms/release/neutral/noarch/mratwork-release-0.0.1-1.noarch.rpm --no-check-certificate
rpm -ivh mratwork-release-0.0.1-1.noarch.rpm
pic:
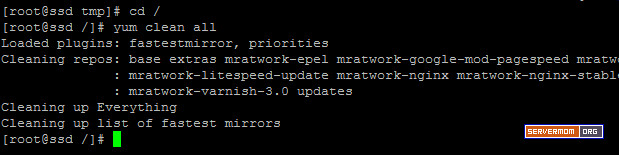
then go back to upper directory
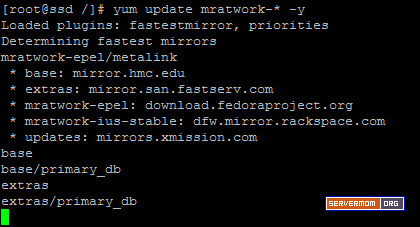
Step 6 – Now issue these series of command before we proceed to the install process:
Mã:
yum clean all
yum update mratwork-* -y
pic:
Step 7 – Now begin the install process with this command:
Mã:
yum install kloxomr7 -y
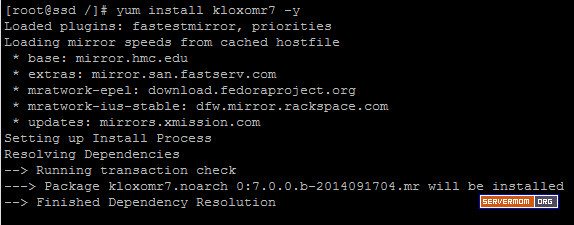
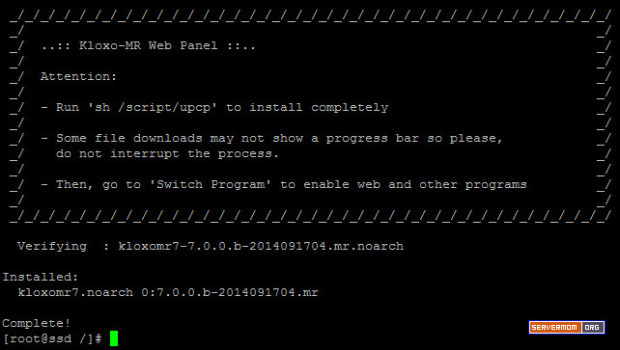
Once done you’ll see something like this:
Step 8 – Now the last magic command to issue is:
That will install everything so the process will be a little bit longer than any previous command above so sit tight and wait till it finished.
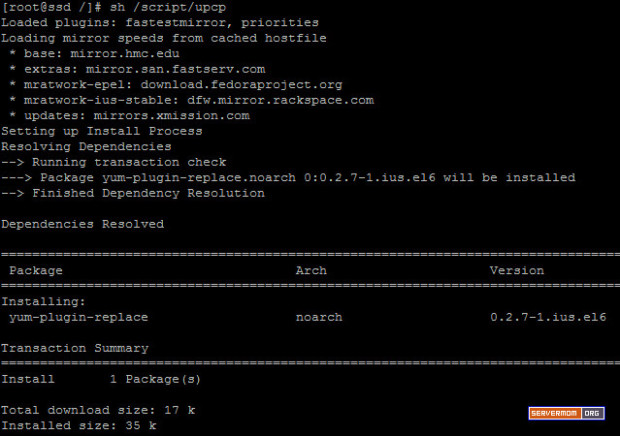
And once done you’ll see something like this:
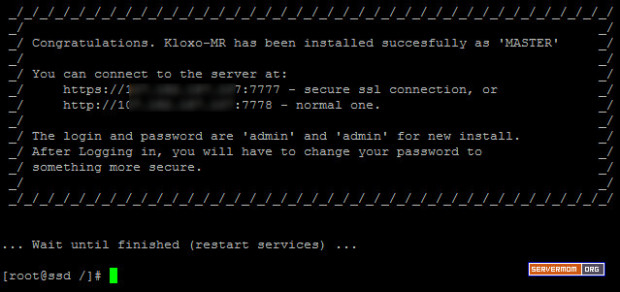
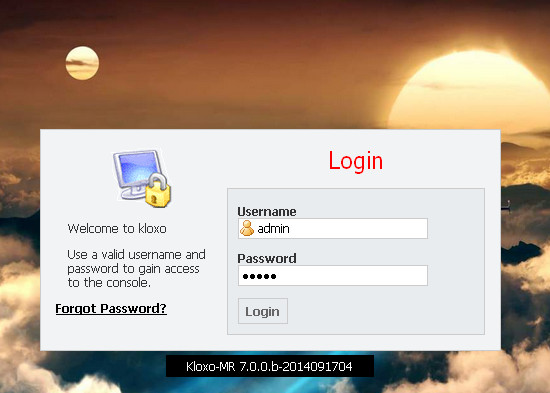
Step 9 – Now open up your favorite web browser and login to Kloxo-MR admin page for the very first time:
https://ip-address:7777 – secure ssl connection, or..
http://ip-address:7778 – normal one.
Default username is admin and password is admin.
View more: http://www.servermom.org/install-klo...ntos-vps/1832/


 LinkBack URL
 About LinkBacks


 Trả lời kèm Trích dẫn